


LinkedIn Ads benchmarks for 2023
In this blog, we highlight why website load speed is crucial to SEO, including how it can help content rank for certain keywords and improve the user experience.
Website load speed is just one of the many factors Google and other search engines look at to determine how well content should rank for certain keywords.
And it's becoming more important for a few reasons:
1) Global mobile web traffic first overtook desktops in October 2016,
2) Technology like Amazon Echo and Google Home are becoming new sources of mobile searches
3) Google has been gradually rolling out mobile-first indexing in response to more inquiries being made from mobile devices.
So, if your website is not offering a first-rate experience for mobile users, your competitiveness on search engine results pages (SERPS) may be negatively impacted. Worse still, if people are not able to view your site properly on mobile, or it takes ages to load, you may find that your website traffic goes elsewhere.
Mobile-first indexing means that Google indexes and ranks the mobile versions of website pages first. Its implementation has been gradual; it was first rolled out for websites that Google saw as mobile and user-friendly, and now over half of the search results are indexed using this method.
Nowadays, sites are more frequently crawled by Googlebot’s mobile crawler. If there are differences between your desktop and mobile website experience, it’ll be the mobile version that appears on Google search results.
Google says this is all in an effort to “better help our – primarily mobile – users find what they're looking for.”
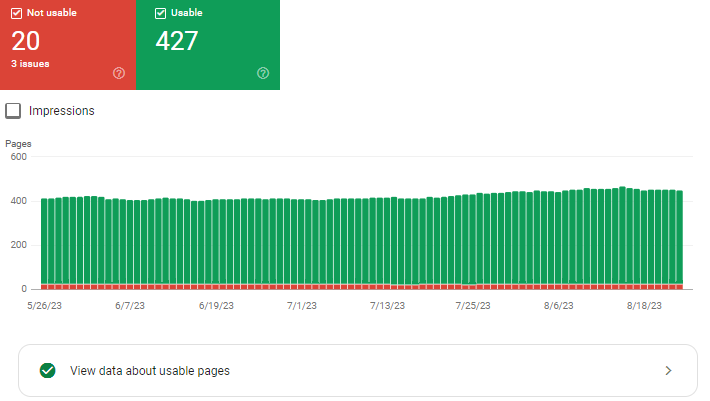
So, make sure to check your Google Search Console account to see if your site is already in the mobile-first index. There should be a notification if it is.
According to websitebuilderexpert.com “the chance of a bounce increased by 32% when a page load time went from one to three seconds, and by 90% when the page load time went from one to five seconds. If a site takes up to 10 seconds to load, then the chance of a bounce increases to 123%”.
The best-performing websites load fast on mobile, so if your website isn't loading in less than 3 seconds, you’re putting your visitor numbers at risk.
Server speed and the complexities of your website’s code contribute to a slow website, but a really common cause is the images on your website.
If they are large (in terms of bytes) or gigantic in size, they'll take ages to load.
Also, what often happens is that whilst an image may appear small on the page itself, it has been uploaded at full print quality and then downsized on the page.
So, even though you only want the image to be small, your browser has to request and load the image from the server at full size and then shrink it down, significantly increasing your load speed.
It will depend on the size of the image on the page and the content of the image.
We find the best approach is to strike a balance between image file size and quality – in other words, make the image as small as possible without making it blurry or if there's text, hard to read.
Generally, you should be aiming for the majority of your images to be no more than 100KB, images larger than this are flagged in our SEO audits.
To help, we’ve put together this step-by-step guide to compressing images in bulk to improve your HubSpot website load speed.
We’ve outlined how to do this in HubSpot because we’re an Elite HubSpot Partner, but these steps could work on other content management systems.
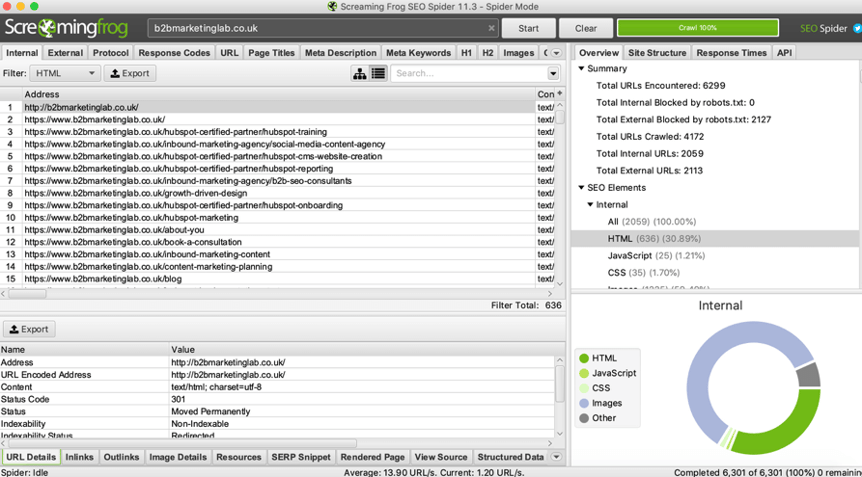
To do this you’ll need a crawler tool. Screaming Frog SEO Spider is an amazing tool that every SEO individual/team should use. Free for up to 50 pages crawled, or £149 per year, it will pay for itself in no time.
Screaming Frog offers more than just finding oversized images to optimise. It crawls the pages of your website, follows the links between them and generates reports on what could be impacting your SEO – from broken links and missing metadata to HREFLANG tag checks and SERP results crawl. But for this task, we’re using the reports specific to oversized images.
Once you’ve installed Screaming Frog, load it up, type in your website’s address and start the crawl.
(If you want to crawl subdomains as well, set this via Configuration -> Spider, before you start)
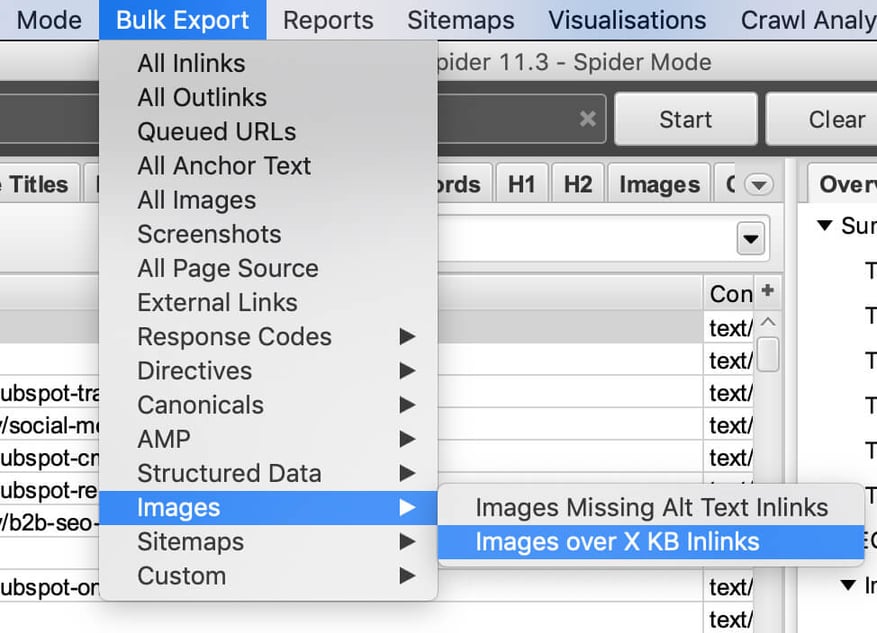
Click Bulk Export -> Images -> Images over X KB Inlinks and download the Oversized images report.
Open the report in Excel and sort by Image Size (Bytes) -> Largest to Smallest.
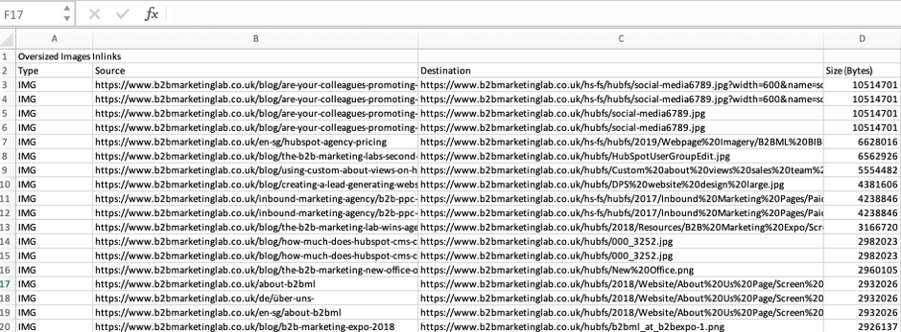
You now have a report showing which images are largest (in Bytes), where they are stored in HubSpot’s file manager (Destination) and what pages they are featured on (Source).
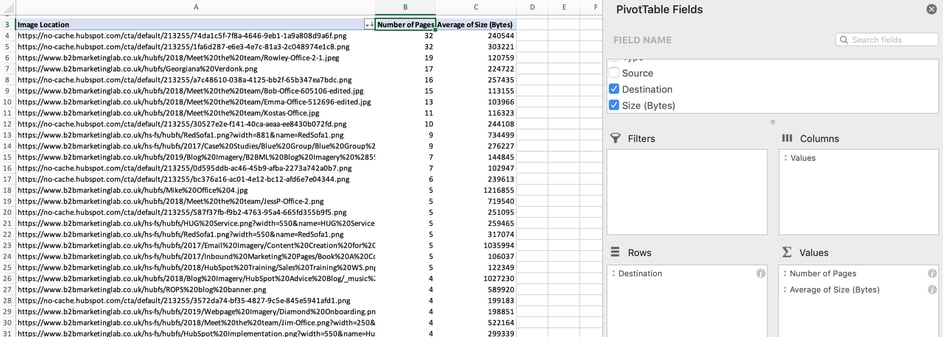
Optional extra: You can use a Pivot Table to find out which images feature on most pages, as this may also help you if you want to prioritise fixing the heaviest images first, or the images featured on most pages.
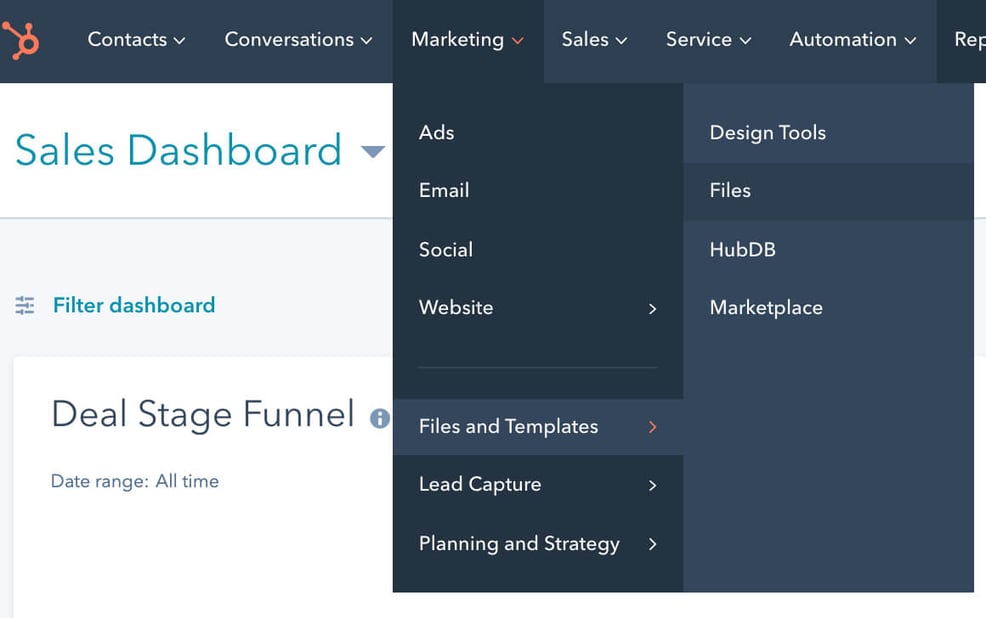
Access HubSpot’s file manager via Marketing -> Files and Templates -> Files
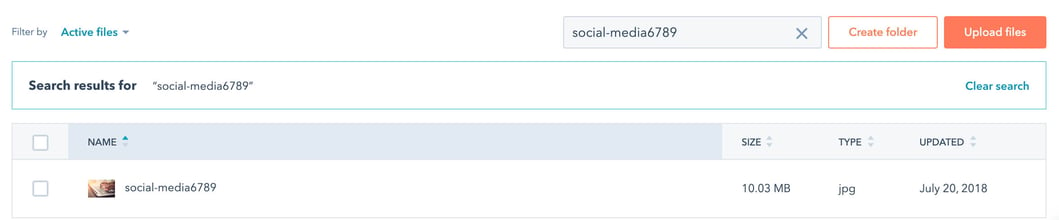
Look at the Destination URL of the first image you want to compress. The image's file name should be in the URL.
Copy and paste the image name into the search bar of HubSpot’s file manager.
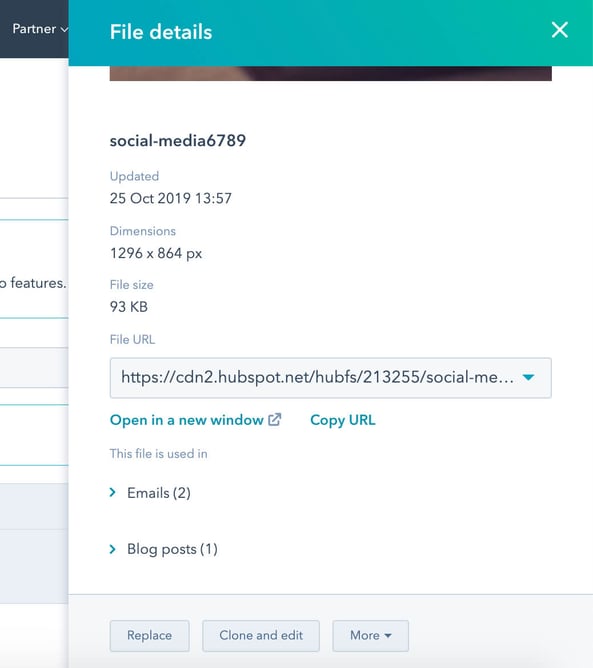
Click on the image to bring up the File Details
From here you can see where the image is used and confirm its size.
Click More -> Download and save the image to your computer.
Optional extra: This is also your opportunity to further optimise the image file name and alt text so it's more descriptive and/or includes a keyword.
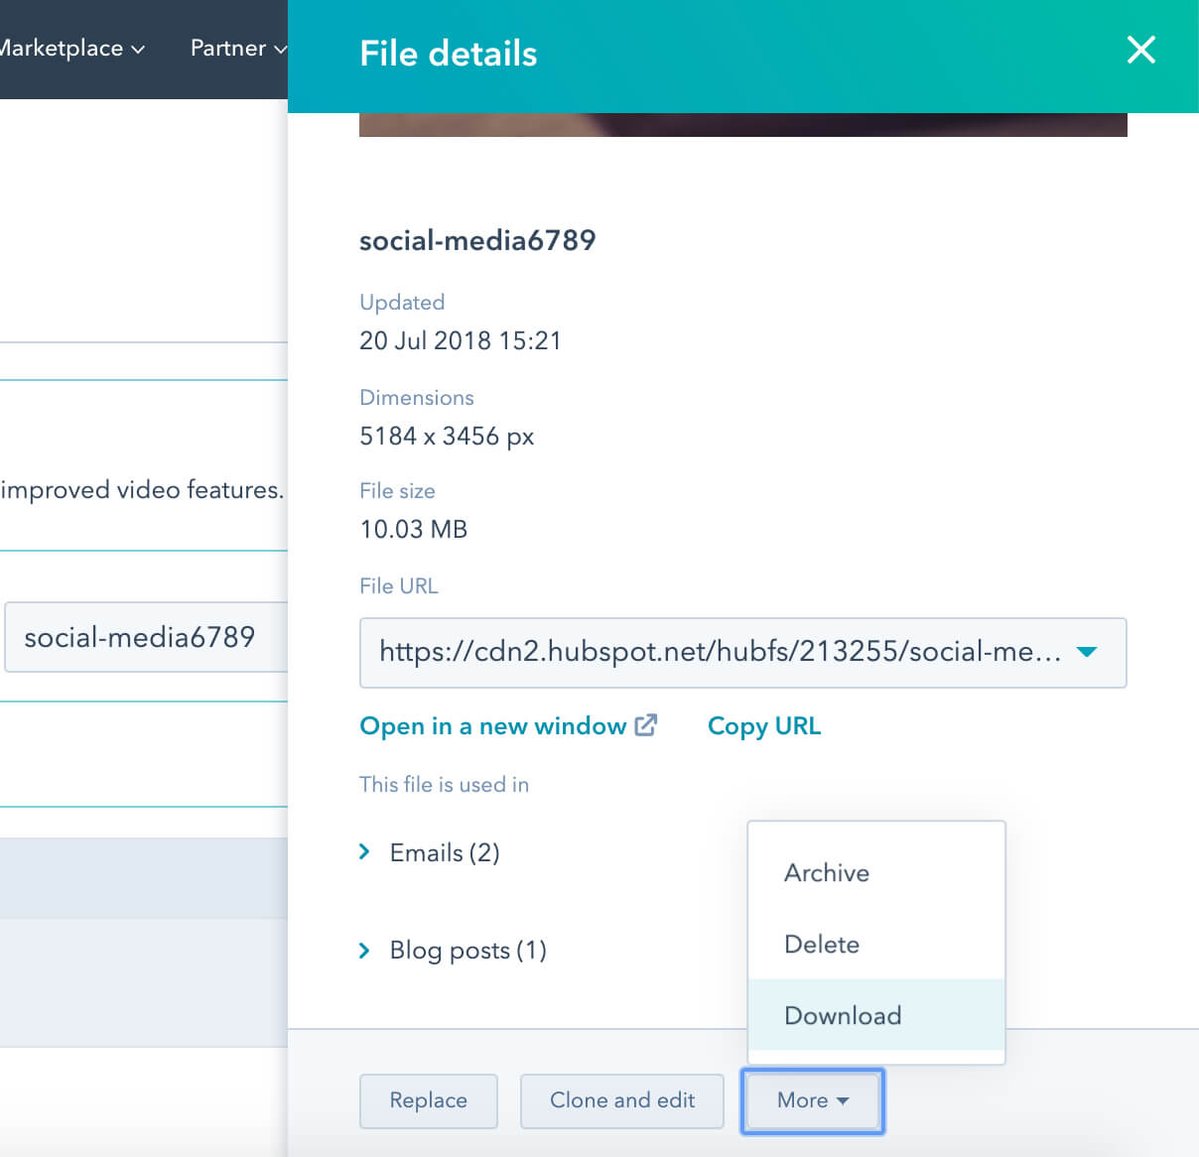
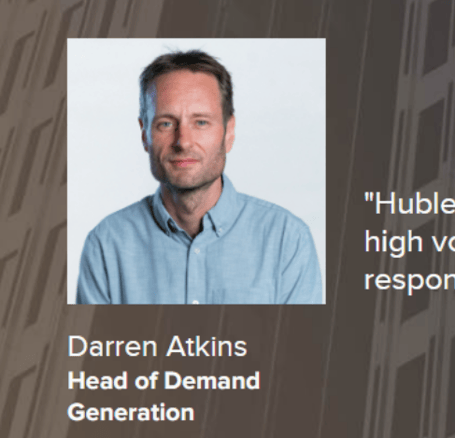
The image in my example is a whopping 10MB, far too large for what’s needed and potentially slowing down the load time of the blog post it’s featured on. What we need is a bulk image compressor.
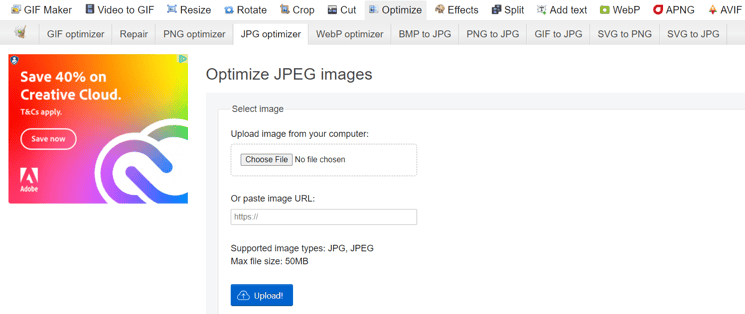
For image compression, I normally use TinyJPG as it's easy to use and can compress images in bulk without making them blurry.
However, TinyJPG has a size limit of 5MB. So, the Huble SEO team uses EZgif.com to reduce files from 50MB to a lower MB.
I then used TinyJPG to compress it down to 386.7kb.
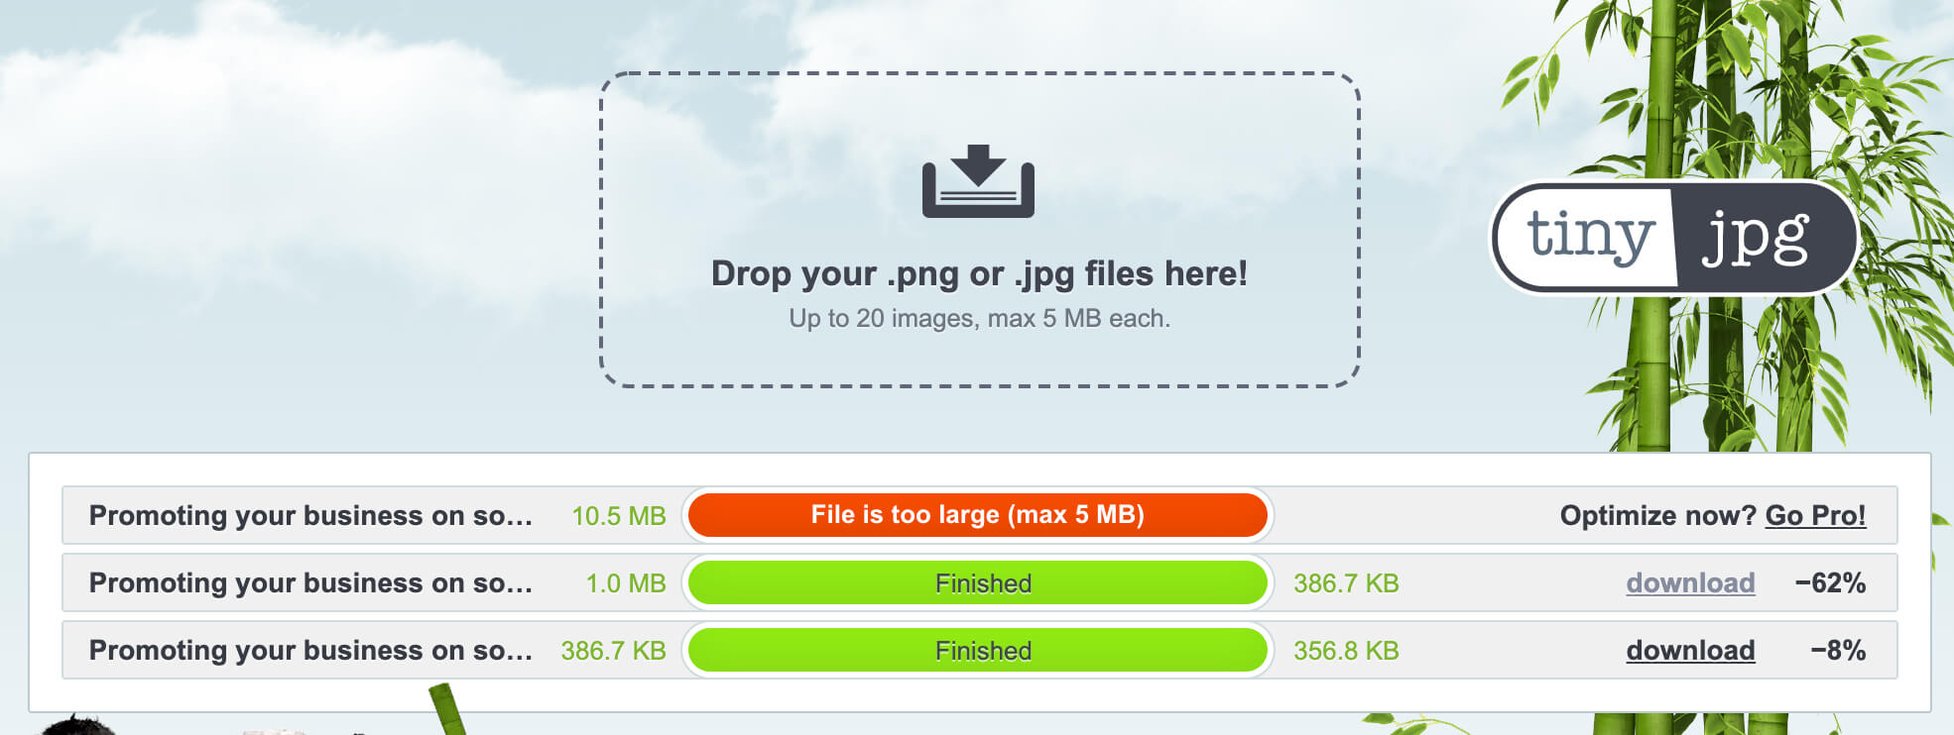
However, while I felt there was still an opportunity to make the image smaller as it wasn't below the 100kb target, there’s only so much compression that can be done. As you can see above, re-uploading the image back to TinyJPG only shaved off another 30kb.
But I did not despair - the image was massive in size: 5184 x 3456 pixels, needlessly large for an image that is only going to be used in a blog post.
Using PicResize, I was able to rescale the image size, and the final output of the resized image was 93KB, with very little noticeable difference in image quality.

So, in this extreme example, I was able to take a 10.03MB image down to 93KB without too much difference in the image quality. By using an image editor - i.e. PhotoShop, or its free open-source equivalent, GIMP, you can potentially bring the file size down even further.
There are also online alternatives, such as PicResize, which allow you to specify the image output size (which I set to no more than 100KB).
Most of the time you would only need to use TinyJPG in this process. You may be wondering: "Why not use PicResize from the beginning?" It can take considerably longer if you’ve got a big batch of images to work on, as each image needs to be uploaded and resized manually, so I would only recommend it for images over 5MB and use TinyJPG for everything else.
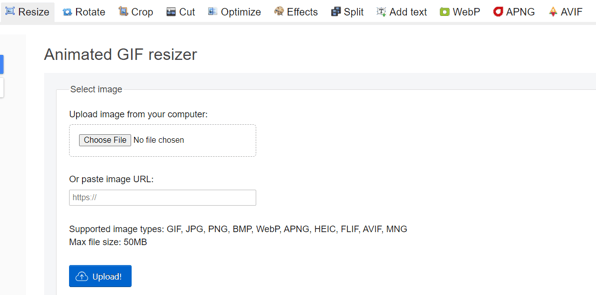
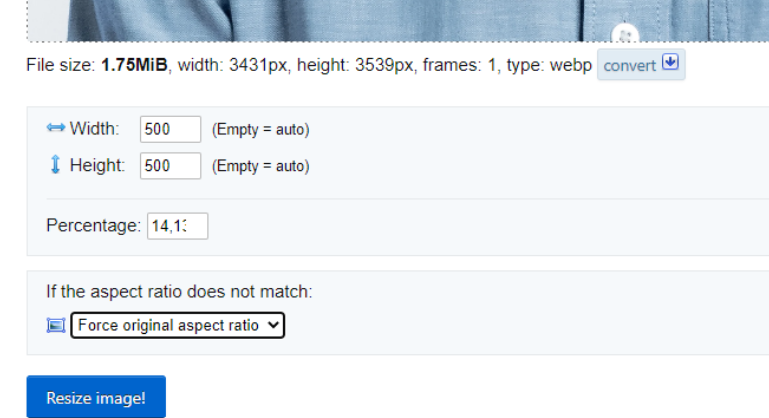
Another tool used by our SEO team is EZGif.com, which has many functions, specifically useful is the https://ezgif.com/resize/ feature to reduce the size of the image's pixels.
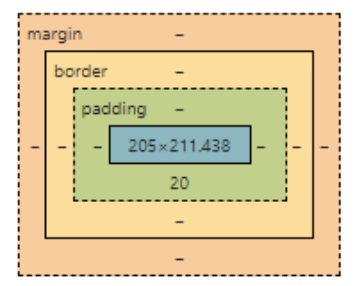
When we look at the source page we can see that the image is a lot smaller than the original aspect ratio.
The image aspect ratio (seen in blue) is the size this image needs to be. However, we can see that the image is thousands of pixels too large.
With EZgif we can adjust the height and width of the image, ensuring that the image is not too small.
Next, it is important to select the “Force original aspect ratio” to keep the original image as it is, without cropping it.
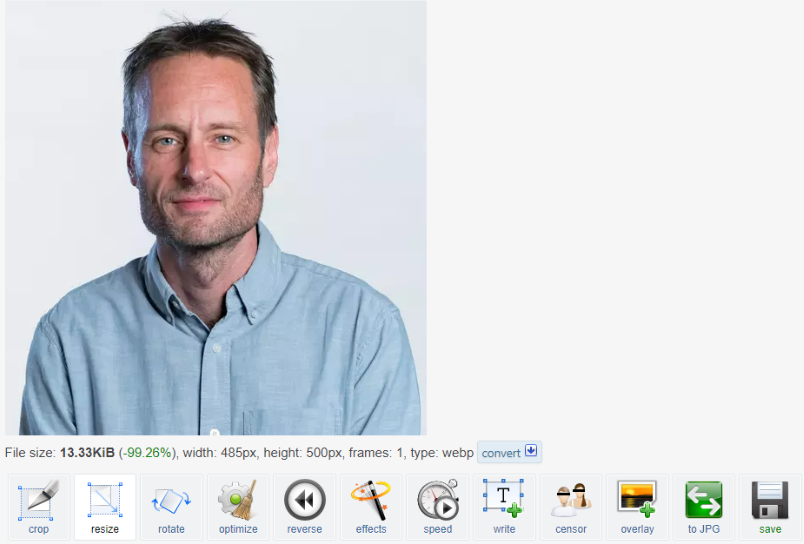
Here we can see that the image size has been reduced without compromising any of the quality. By reducing the size of the image in pixels has significantly reduced the size in KB.
The last step is really simple.
Go back to your image in HubSpot’s file manager and click Replace.
Upload your new compressed image and you’re done!
The great thing about HubSpot is that the image is replaced but stays in the same location. This means that all of your content using the image automatically updates with the compressed version, which is a HUGE time-saver. After all, ensuring the content you create for your B2B content marketing strategy is optimised is essential!
Finally, go back to your images report in Excel, get the name of your next image and repeat the steps above. Hopefully, you’ll see your pages load faster in no time!
Learn more about improving your site’s SEO on our blog, or find out about our SEO consultancy services.
.png)
Your website is your most valuable sales and marketing tool, so it needs to be as optimised as it can be. Uncover opportunities to boost your rankings with a free SEO audit.


